After moving to our little apartment here in Arizona, we had a few weeks before Shawn started his summer grad school semester. So we used that time to unpack and try to do as much as we could to get organized before he would be super busy. We thought that we had done a lot to downsize and declutter before we moved here. Ha. We quickly realized that we still had more stuff than we had room to store it all, so we took the whole “Life Changing Magic of Tidying Up” approach to ruthlessly getting rid of stuff we don’t need. I get sentimental about things–from high school Spanish club t-shirts that I never wear to lesson plans I worked so hard on during student teaching that I will most likely never use again. It’s not my fault, it’s genetic. My dad hoards computer monitors and keyboards from the 80’s, and my mom has kept files of old purple ditto copies from her years teaching first grade before I was born. And hey, it’s not always a bad thing–my mom has often used things from her teaching files throughout the years, and my dad once brought his electronic graveyard to the kindergarten class I was student teaching when they were learning about things that come apart. The kids had the best day of their lives taking apart the old keyboards, remote controls, and corded telephones, and I’m pretty sure my dad enjoyed their wide-eyed awe and reverence for these strange inventions as he showed them the electronic circuit boards inside and told them about how they worked.
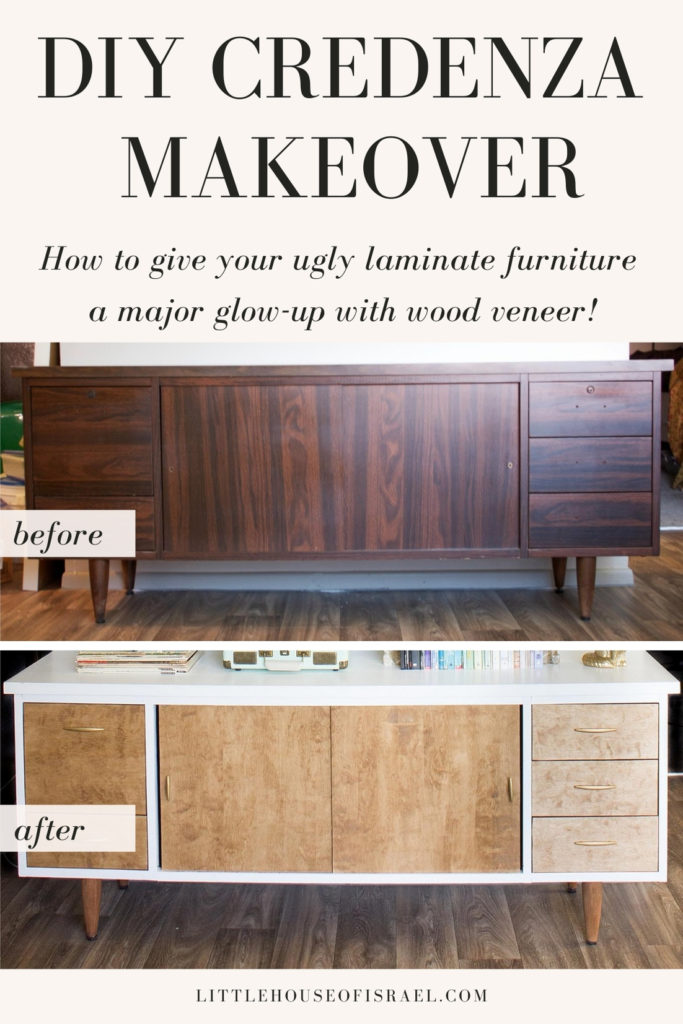
I’ll be sharing the rest of our apartment and projects we’ve done bit by bit, but today I want to share one project that I’m pretty dang proud of. It’s the mid-century modern style laminate credenza that we found for $50 at the local Habitat for Humanity ReStore. It was the perfect size to fit along the empty wall between our living room and dining room area and we loved the idea of being able to store things out of sight in the drawers and shelves behind the sliding doors. I love all things mid-century modern and keep an eye out for MCM furniture on Craigslist, so I knew vintage credenzas or sideboards made of real wood from back then sell for hundreds of dollars. This piece was made mostly of pressboard with just the frame and legs being real wood and all of it was covered with cheap laminate. But it was in great condition and had such a great shape that I knew it had potential for looking much more sophisticated. Here’s the before picture. We had already removed the hardware before I remembered to take a photo, but they were just simple silver handles.

My original idea was to re-cover the entire credenza with wood veneer and then stain it in order to have an authentic wood grain look rather than the obviously fake laminate. But once I researched peel and stick wood veneer and found out how expensive large sheets are, I decided that wouldn’t be worth the cost. Plus I realized that it would probably be a pain to cut precise little strips of wood veneer for the edge pieces that border the drawers and doors on the front.
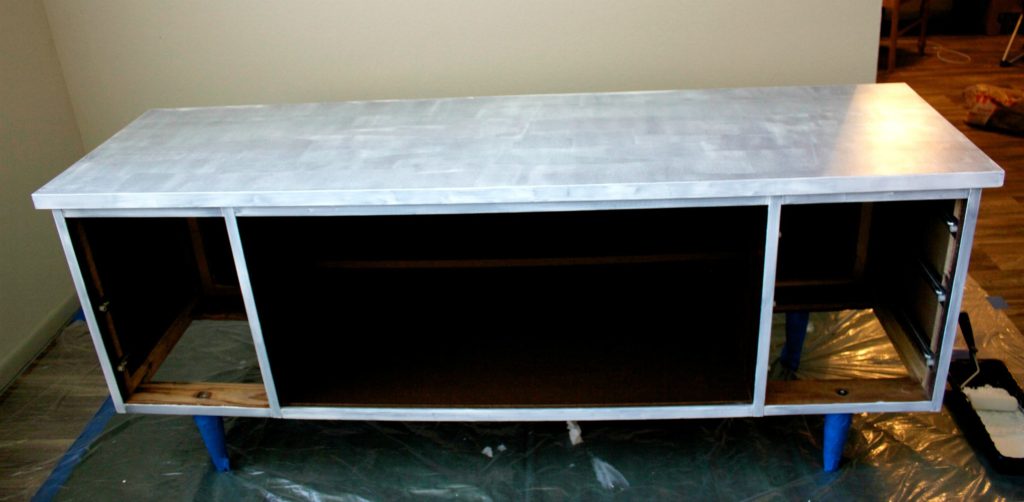
So instead I decided to take out the drawers and sliding doors and paint the entire frame white, with the exception of the legs, and then cover the drawers and doors with peel and stick birch wood veneer. I used Behr Ultra Pure White paint and primer in one and let’s just say this took a lot more coats than I thought it would. The laminate was such a smooth surface that it was hard for the paint to really adhere to it and cover it even though it’s supposed to work on all kinds of surfaces. It just took lots and lots of coats before the paint really covered the laminate completely. I used a foam roller for the top, sides, and back and a small cheap 1-inch art paintbrush I had on hand to do the edging bits on the front.
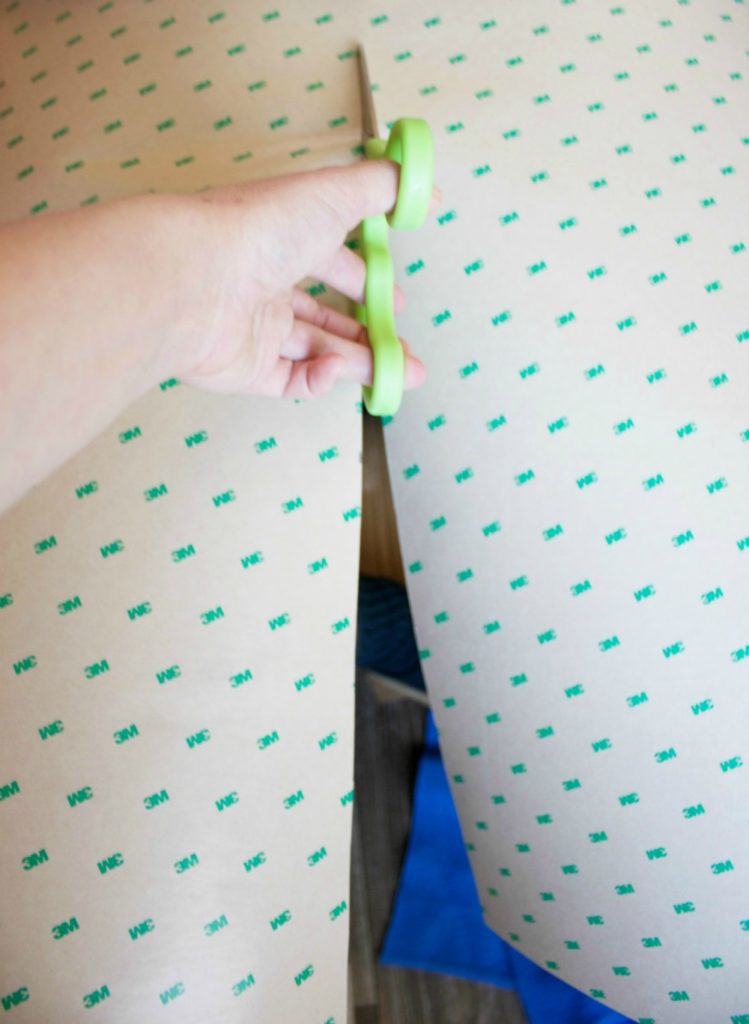
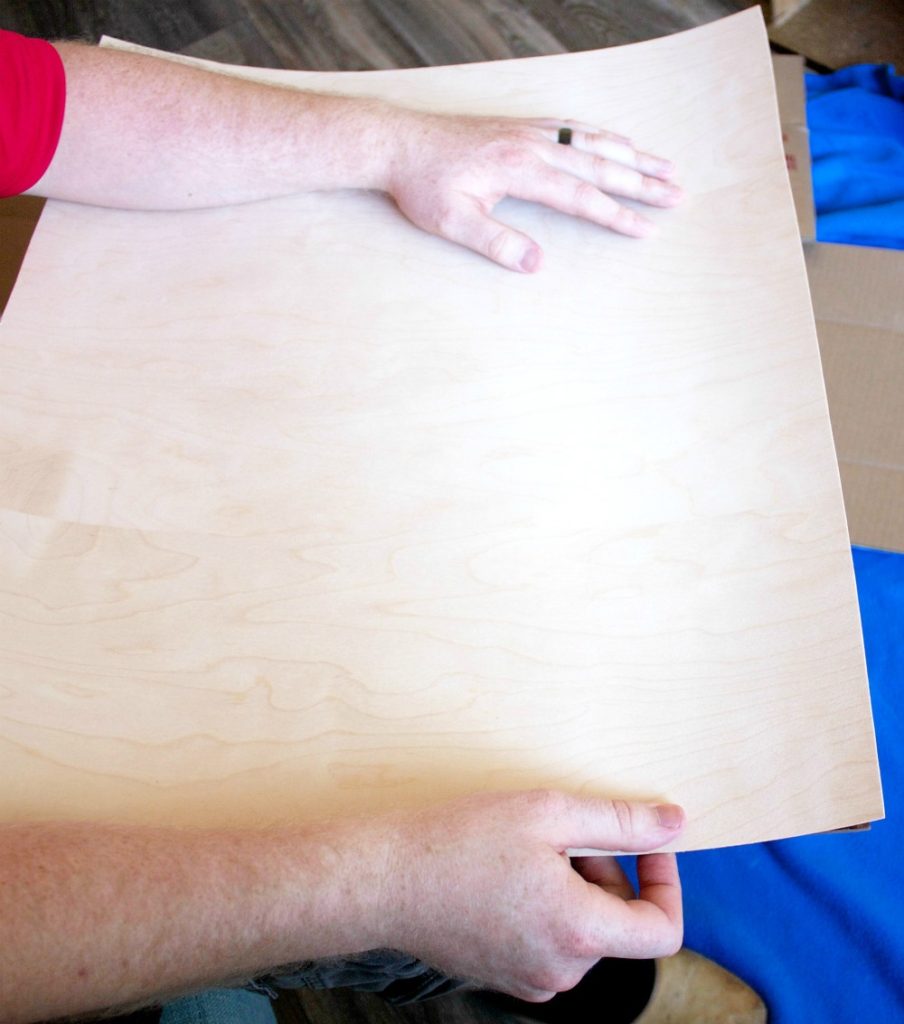
Next Shawn helped me adhere the wood veneer to the doors and drawer fronts. I used unfinished birch wood veneer with PSA backing (2 ft x 8 ft) which I found on Amazon. First we measured the area we needed to cover and marked it off on the backing paper of the wood veneer. Then we cut it to size.
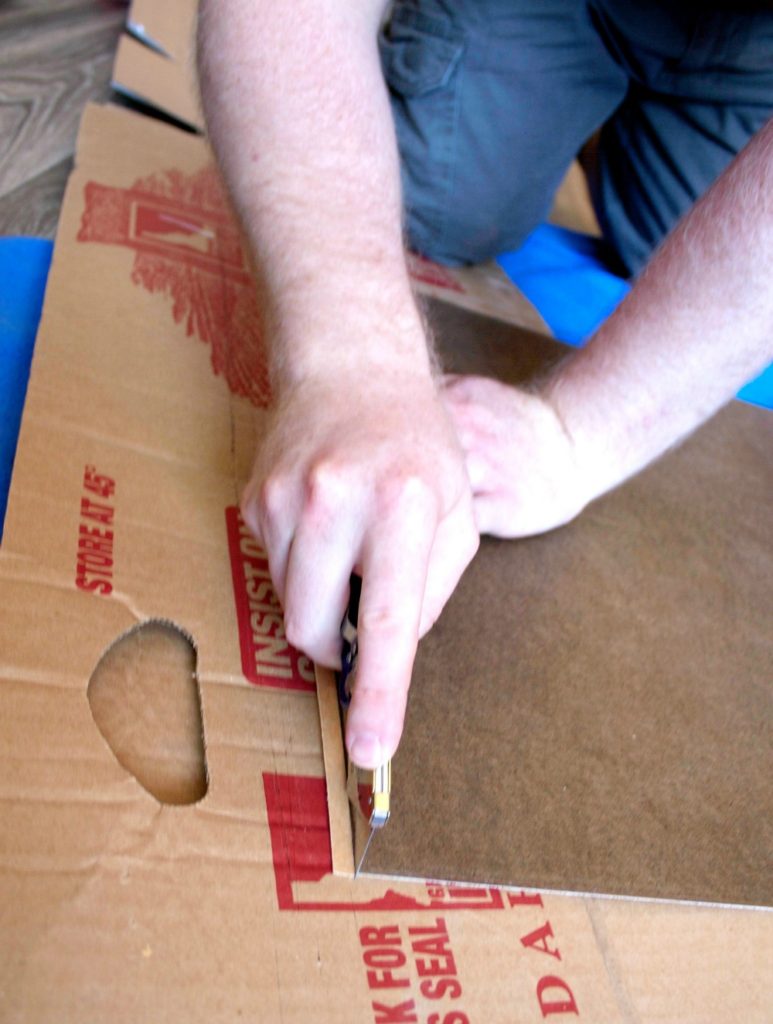
Scissors worked well for most of the cuts, but for some cuts we found it was easier to make the cuts straight using a razor. (I think in the below picture Shawn was trimming the against the grain edge of one of the pieces that went on one of the sliding doors after it was adhered actually, because it was a really tiny edge to trim and it was easier to trim it after it was stuck onto the door front.)
After cutting, we laid out the veneer piece on top of the drawer front or door to make sure we had the size right. The application process really wasn’t too hard. Folding the backing paper back an inch or so, we carefully lined up an edge and stuck it down, then one of us pulled the backing paper off bit by bit while the other smoothed the veneer down, making sure to adhere it completely and not let any bubbles form. Larger pieces were a little trickier than the smaller drawers to line up perfectly but overall it went pretty smoothly.
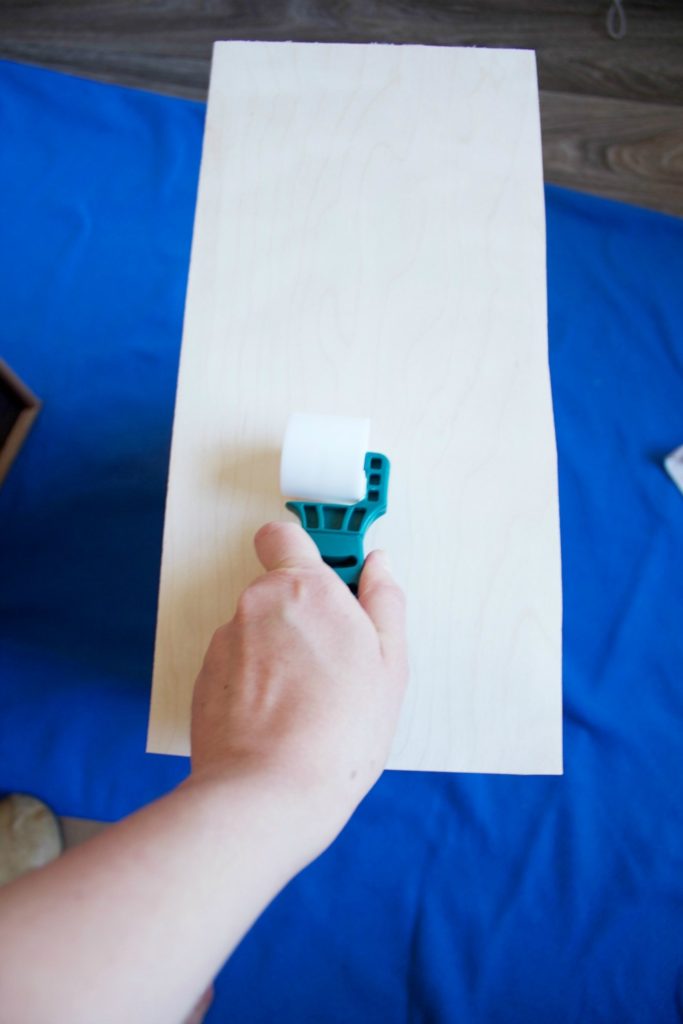
We had watched some YouTube videos about the process beforehand (this one was helpful) and they recommended using a wallpaper seam roller tool to apply pressure and help smooth the veneer down. The only one we could find at Home Depot or Lowe’s was all made of plastic and was kind of a ripoff because as you smooth the veneer you’re pushing pretty hard on the little roller part of the tool (like you do when you use a paint roller) but the roller part of our tool was flimsy and not attached securely on both ends so it kept popping off as we went along. As we were using our dinky little plastic tool I was wishing I had one of the print brayers from the printmaking kit in my art classroom. A brayer would have been much sturdier and covered a lot more surface area at once. If you’re going to do a project with wood veneer I would recommend getting a sturdier tool with a roller made of rubber or silicone, not plastic, like this $10 Speedball brayer you can get on Amazon.
After getting the wood veneer adhered to the doors and drawer fronts, there were a few in-between steps we did that I forgot to take pictures of. I sanded down the legs of the credenza to prep them for staining, and I used my rusty trusty best friend holy grail of all spray paints, Rustoleum Metallic Gold, to spray paint the old silver hardware. This spray paint is seriously amazing. The color and sheen of the lid makes it look like it’ll be a super tacky and shiny shade of gold, but don’t let it deceive you. It covers everything it touches with the most perfect Midas touch of matte brass sheen. And I’m not being sponsored by Rustoleum or anything (I wish) but this spray paint is just so good, it’ll be making regular appearances in several upcoming DIY posts. Shawn drilled little holes in the wood veneer so that we could still attach the hardware–I think since the holes were still visible on the other side of the drawer fronts and doors, he just carefully drilled through the veneer from the back side. You do have to be really careful doing that because it can splinter a little bit, but we didn’t have any issues with splintering that the handles didn’t cover up completely once they were attached. I used Minwax Special Walnut to stain the veneer and the legs of the credenza and I was so thrilled that I was able to get them to match each other pretty well even though they didn’t start out as the same wood tones! I think I only did one stain coat on the legs and two on the doors and drawer fronts and that did the trick. The biggest pain about putting everything back together was the fact that by adding just a few millimeters of thickness to the sliding doors with the veneer, they no longer fit perfectly in their little grooves. So we had to sand the grooves down to make them fit and be able to slide back and forth again and that was a project in and of itself. Sandpaper didn’t cut it and we ended up using a small dremel tool with a circular sandpaper attachment to get all the way into the upper and lower grooves and sand them down. If you do a project with wood veneer I would avoid using it for sliding doors if possible because it really was a huge pain to sand those stupid grooves down.
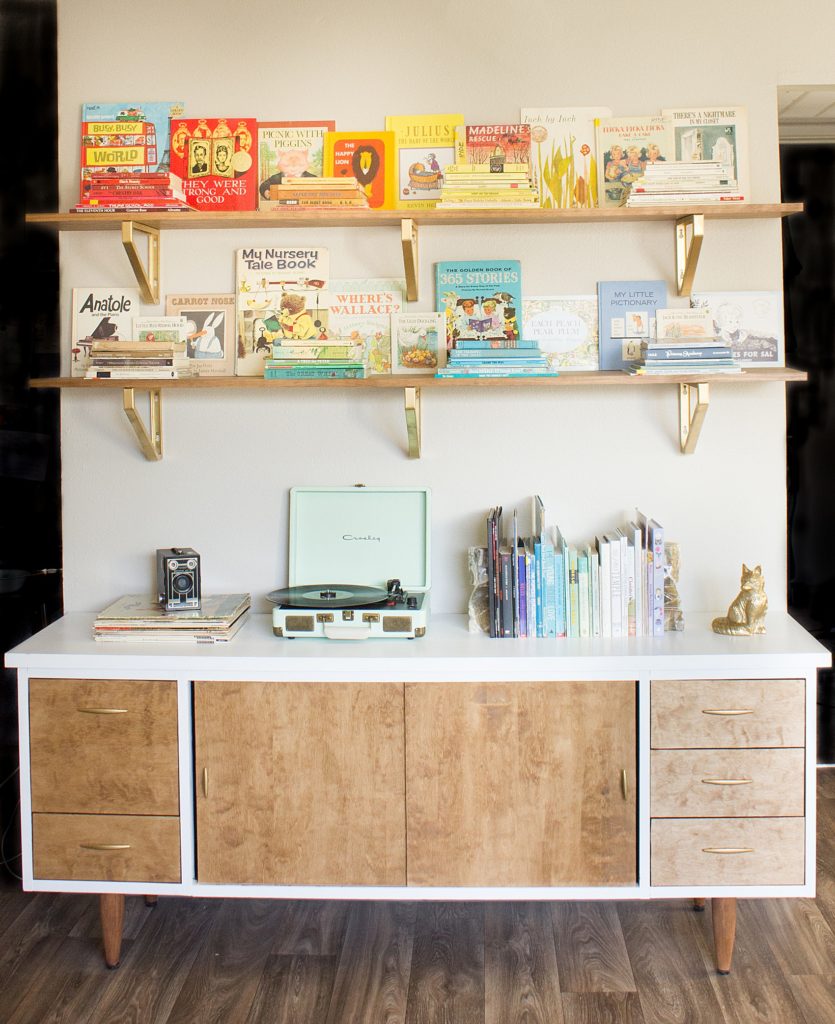
But it was worth it! I love how the credenza turned out. I think it’s so pretty and I’m pretty proud of how we were able to transform it into a beautiful, functional piece of furniture that we’ll use forever. We keep our DVD’s and books that I don’t deem pretty enough to display with my vintage children’s book collection on the shelves above inside the cupboard behind the sliding doors, and the drawers are full of my random craft and art supplies. Those shelves above the credenza are another DIY that will have to wait for another day, but spoiler alert: the same gold spray paint was a key player in that project as well.
For anyone who wants to check them out, here are all the links for the materials we used in this DIY:
Wood Veneer Credenza Makeover Materials:
Unfinished birch wood veneer with PSA backing, 2 feet by 8 feet
Minwax Special Walnut stain
Speedball hard rubber brayer (this is the tool I would recommend using instead of the plastic one we used)
Behr Ultra Pure White paint and primer in one
Foam roller
Small 1-inch paintbrush (the largest flat brush in this set is similar to the one I have)
Rustoleum Metallic Gold spray paint
Sandpaper
Dremel tool and accessories (hopefully if you do a similar project you won’t need to use this because you’ll take my advice and avoid anything with tiny grooves that would have to be sanded but just in case, here’s the tool we used)
Let me know if you have any questions about this project or about working with wood veneer! I was impressed at how easy it was to use and what an impact it made. And if you try out a similar project, come back and let me know how it goes!
